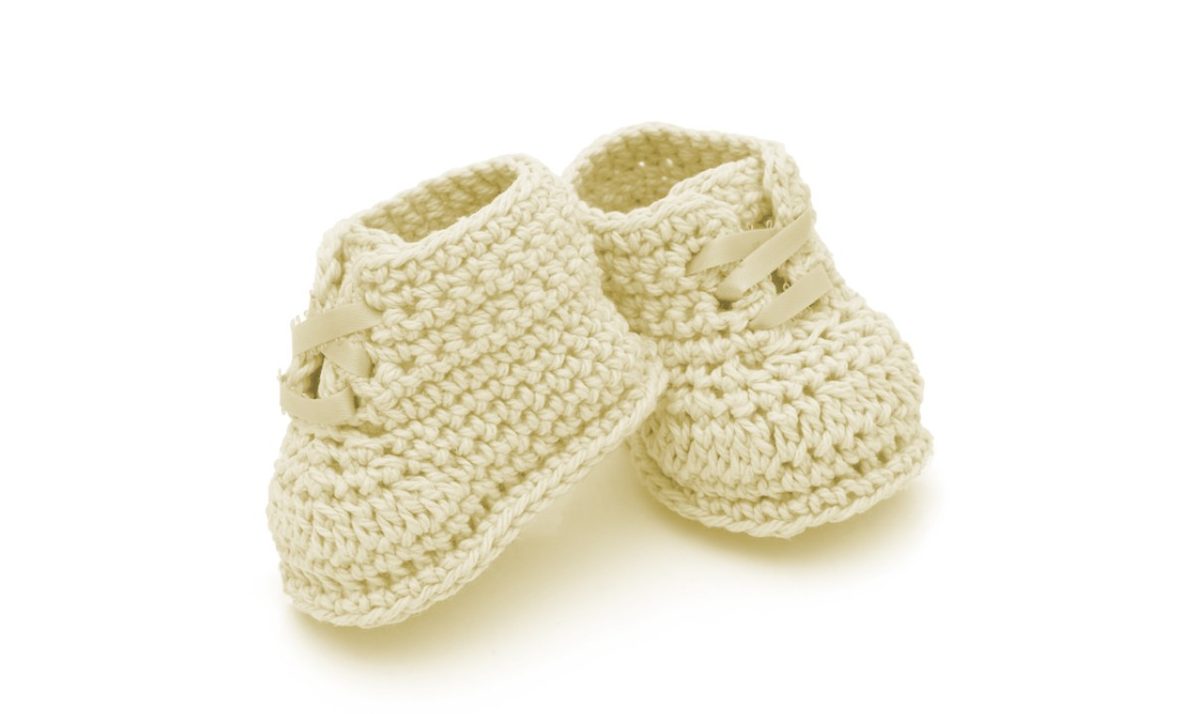

These free crochet ribbon baby booties are one of the most beginner-friendly baby patterns you’ll find — and that’s not a claim made lightly. They’re worked entirely flat in simple rows. No working in the round. No magic ring. No complicated shaping that requires reading a chart. Just rows of single crochet, a small amount of seaming at the end, and a pretty ribbon threaded through an eyelet row to finish.
The construction is brilliantly simple: you start with a flat rectangle that forms the back and sides of the bootie, then add a small toe flap from the center stitches, and finally sew the three pieces together into a shoe shape. The seaming takes five minutes and is very forgiving — even if your stitches aren’t perfectly even, the ribbon bow at the front draws the eye and makes everything look intentional.
The result is the sweetest pair of booties with a soft satin ribbon bow at the front — perfect as a handmade baby shower gift, a newborn photo prop, a christening gift, or just something beautiful to make for the new baby in your life.
How long do they take? Each bootie takes around 20–30 minutes once you know the pattern. The whole pair — including seaming and threading the ribbon — takes about an hour. They make a wonderful last-minute gift.
What makes them special? The ribbon eyelet detail is what sets these apart from basic crochet booties. The eyelet row creates a series of small holes around the top of the bootie through which the ribbon weaves in and out — tie it in a bow at the front and they look like something from a boutique. The satin ribbon also provides a little gentle closure that helps keep the bootie on tiny feet.
What You’ll Need
Yarn: The best choice for baby booties is a soft DK weight cotton yarn. Cotton gives you clean stitch definition, holds its shape after washing, and is gentle against newborn skin. We recommend checking that your yarn is machine washable at 30°C — parents will thank you.
About 30–40g is plenty for one pair.
Materials:
- DK weight cotton yarn (approx 30–40g)
- 4.0mm crochet hook
- 2 lengths of ribbon, 45cm (18 inches) each — one per bootie
- Yarn needle
- Scissors
Gauge: 16 sc × 20 rows = 4 inches (10 cm) square
Gauge matters less for booties than for garments, but if your stitches are much looser or tighter than this, adjust your hook size by half a millimetre.
Sizes
| Size | Foot Length |
|---|---|
| Newborn | 3 inches (7.5 cm) |
| 0–3 months | 3.5 inches (9 cm) |
| 3–6 months | 4 inches (10 cm) |
The pattern below is written for newborn / 0–3 months. Notes for 3–6 months size are given in brackets where they differ.
Abbreviations
ch— chainsc— single crochetsc2tog— single crochet decrease: insert hook in next st, pull up loop, insert hook in following st, pull up loop, yarn over and draw through all 3 loops on hookst(s)— stitch(es)RS— right sideWS— wrong siderep— repeat
Pattern — Make 2
Foundation
Ch 21 (23 for 3–6 month size).
Body
Row 1 (RS): Sc in 2nd ch from hook, sc in each ch to end. 20 sc (22 sc). Ch 1, turn.
Rows 2–10: Sc in each st across. Ch 1, turn. 20 sc (22 sc).
You now have a neat rectangle. This forms the back and two side panels of the bootie.
Shape the Top Opening
This step creates the two side panels that will form the ankle opening of the bootie.
Left side panel:
Row 11: Sc in first 5 sts only. Ch 1, turn. Leave remaining sts unworked. 5 sc.
Rows 12–17: Sc across. Ch 1, turn. 5 sc.
Fasten off.
Right side panel:
Skip the center 10 stitches of Row 10. Rejoin yarn to the 16th stitch.
Row 11: Sc in last 5 sts. Ch 1, turn. 5 sc.
Rows 12–17: Sc across. Ch 1, turn. 5 sc.
Fasten off.
The 10 center stitches you skipped will become the toe of the bootie.
Toe Flap
Rejoin yarn to the 6th stitch of Row 10 (the first of the 10 center stitches).
Row 1: Sc in next 10 sts. Ch 1, turn. 10 sc.
Rows 2–5: Sc across. Ch 1, turn. 10 sc.
Row 6: *Sc2tog; rep from * across. Ch 1, turn. 5 sc.
Row 7: Sc2tog, sc in next st, sc2tog. 3 sc.
Fasten off, leaving a 20cm (8 inch) tail for sewing.
Eyelet Row (for ribbon)
This row creates the small holes you’ll thread the ribbon through.
With RS facing, rejoin yarn at the top right corner of the bootie (top edge of the right side panel).
Row 1: Sc evenly across the entire top edge of the bootie. Ch 1, turn.
Row 2: Sc in first st, *ch 1, skip 1 st, sc in next st; rep from * across.
Fasten off and weave in end.
Finishing
Step 1 — Sew the back seam
Fold the bootie so the two short ends of your rectangle meet. Using your yarn needle and a length of yarn, sew the back seam from the top of the cuff down to the sole. This closes the back of the bootie.
Step 2 — Sew the toe
Use the long tail you left at the toe to sew the toe flap seam closed. Work from the tip of the toe downward, joining the toe flap to the front edge of the side panels.
Step 3 — Sew the sole
With a new length of yarn, sew along the bottom edge to close the sole of the bootie.
Step 4 — Add the ribbon
Thread your ribbon through the eyelet row around the top of the bootie. Start and end at the center front, then tie in a small bow. Trim ribbon ends neatly at an angle to prevent fraying.
Step 5 — Weave in all ends
Use your yarn needle to weave in all remaining yarn ends securely on the WS of the bootie.
Tips for Best Results
Tension: Keep your sc stitches consistent throughout. If you crochet tightly, go up to a 4.5mm hook. If your booties come out too large, try a 3.5mm hook.
Seaming: A whip stitch works well for all seams on this bootie. Keep your seam stitches small and even for a neat finish.
Ribbon choice: A 6–8mm satin ribbon works beautifully. Cut the ends at a 45° angle immediately after cutting to prevent fraying. You can also lightly seal the ends with a small amount of clear nail polish.
Washing: Always wash booties before gifting. This pre-shrinks the yarn and softens the cotton. Machine wash at 30°C in a mesh laundry bag, reshape and lay flat to dry.
Frequently Asked Questions
How long do these baby booties take to crochet? Each bootie takes around 20–30 minutes once you’re familiar with the pattern. A full pair takes around 45–60 minutes.
Can I use acrylic yarn instead of cotton? Yes — a soft, quality acrylic (like Paintbox Simply DK) works well. Avoid scratchy or budget acrylics. Press the yarn against your cheek before buying — if it scratches there, it’s not suitable for baby skin.
How do I make them bigger? For 3–6 months, follow the numbers in brackets throughout the pattern. For larger sizes, add 2 stitches to the foundation chain and adjust the toe section accordingly.
Can I sell items made from this pattern? Yes! You’re welcome to sell finished booties made from this pattern. Please credit Bloom Bonnet when sharing online.