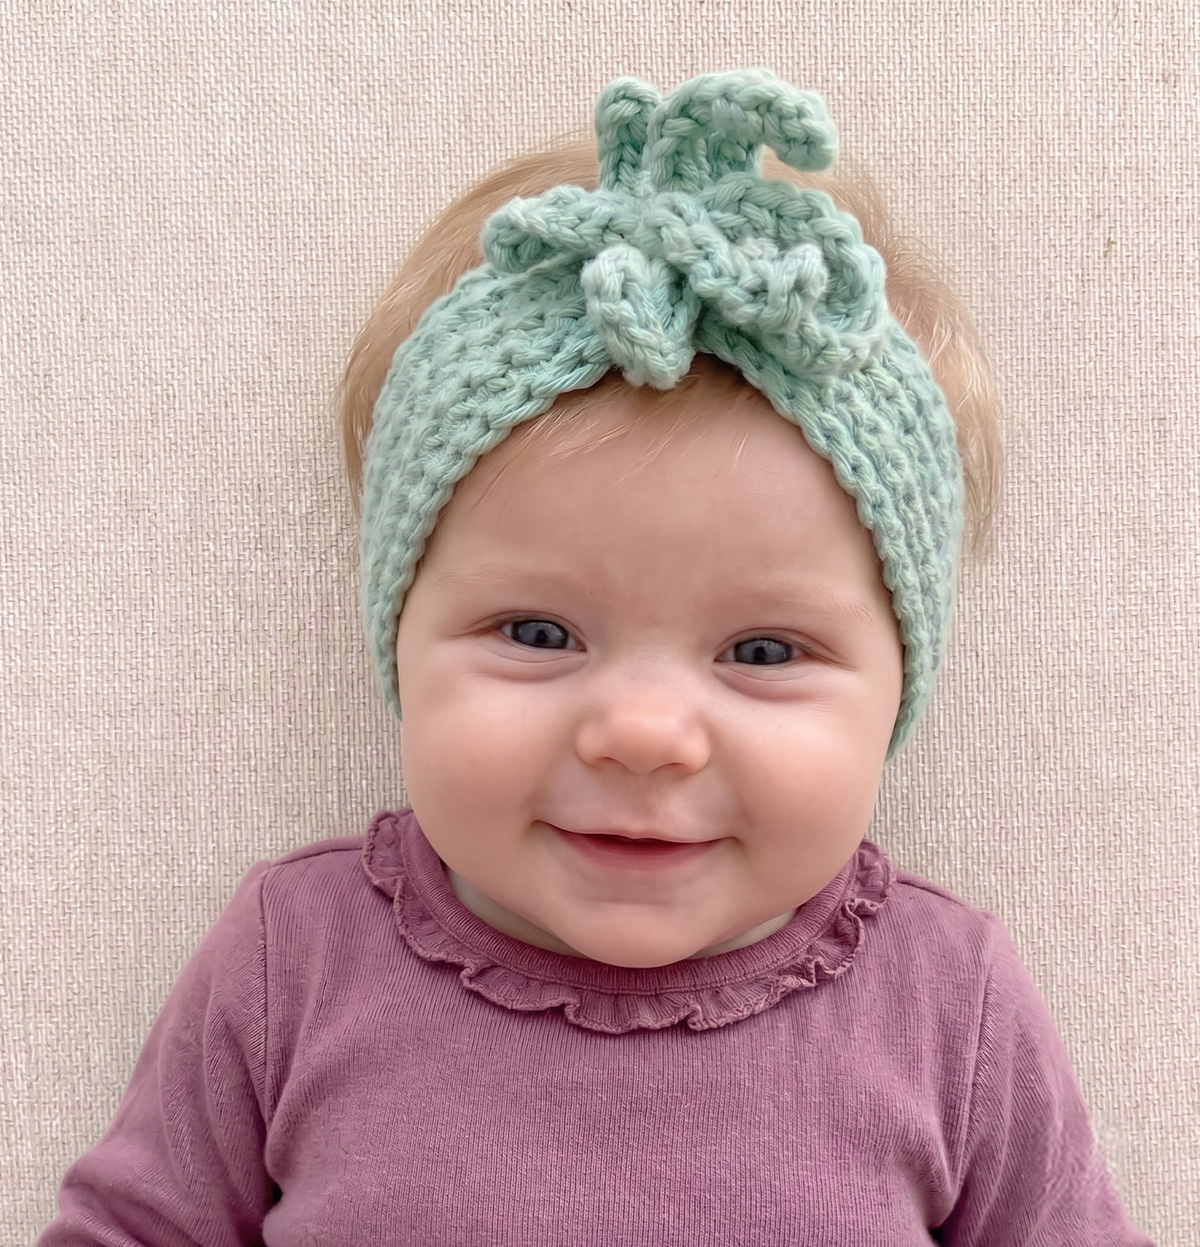

This one started with a leftover half-ball of yarn and a baby who point-blank refused to keep a bow clipped in her hair. We’d just finished a batch of bonnets for a shop order and had scraps sitting around, so one of us started fiddling — a plain ribbed strip, worked back and forth, no real plan. Somewhere around row ten it got twisted into a knot without really meaning to, just to see how it would sit.
It sat perfectly. Like it had been the plan all along.
That’s the whole trick behind this pattern — a single strip of ribbed fabric, tied into one soft knot, then joined into a loop. No fussy shaping, no separate pieces to sew together, and the ribbing gives it just enough stretch to sit snugly without a headache-inducing squeeze.
What Yarn Is Best For This Headband?
A smooth DK weight cotton or cotton-acrylic blend works beautifully here — it holds the ribbed texture crisply and has enough give to stretch comfortably over a baby’s head without pulling at their ears.
A solid, muted color (like the soft sage green shown here) lets the ridged texture and the knot itself do the talking. One small ball is more than enough for a headband with yarn to spare.
Avoid anything too splitty or fuzzy for this one — the ribbing rows use the back loop only, so a smooth, well-plied yarn makes it much easier to see exactly where your hook is going.
Materials
- Yarn: DK weight (Category 3), approx 35–50m
- Hook: 4.0mm (US G/6)
- Notions: Tapestry needle, scissors, stitch marker (optional, to mark your starting stitch each row)
Gauge
Gauge doesn’t need to be exact for this pattern — it relies on stretch and a bit of trial and error more than precise measurements. Check your strip length against the size chart below before tying the knot, and add or remove a few rows if needed.
Sizes
| Size | Average Head Circumference | Finished Strip Length |
|---|---|---|
| Newborn | 13–14 inches (33–36 cm) | 15 inches (38 cm) |
| 0–3 months | 14–15.5 inches (36–39 cm) | 16 inches (41 cm) |
| 3–6 months | 16–17 inches (41–43 cm) | 17.5 inches (44 cm) |
| 6–12 months | 17–18 inches (43–46 cm) | 18.5 inches (47 cm) |
The finished strip length already includes extra for the knot — once tied and joined into a loop, the headband should sit about 2–2.5 inches smaller than head circumference so the ribbing’s natural stretch keeps it snug.
Abbreviations
| Abbreviation | Meaning |
|---|---|
ch |
chain |
hdc |
half double crochet |
hdc-blo |
half double crochet, worked into the back loop only |
sl st |
slip stitch |
st(s) |
stitch(es) |
row |
row |
Pattern is written in US terms.
How To Crochet The Twist Knot Headband
How To Start The Ribbed Strip
Chain 13 (11 sts + 2 for turning).
Row 1: Starting in the 3rd ch from hook, 1 hdc in each ch across. Turn. (11 sts)
Row 2: Ch 2 (counts as first st, does not count as a turning chain elsewhere in the pattern), hdc-blo in each st across, working the last st into the top of the turning ch. Turn. (11 sts)
Working into the back loop only on every row is what gives this headband its ridged, corded texture — and it’s also what makes the fabric so stretchy, since each ridge can flex open a little under tension.
How To Work The Strip To Length
Repeat Row 2 until your strip measures the “Finished Strip Length” for your size from the chart above, ending after a completed row. Lay it flat and unstretched to measure — pulling on it while measuring will give you a shorter finished band than you want.
Tip: Count your rows as you go. Once you know how many rows got you to the right length the first time, you can skip measuring on your next one and just repeat the row count.
Fasten off, leaving a long tail of about 12 inches for seaming.
How To Tie The Knot
Lay the finished strip flat. Find the center point and tie a single loose overhand knot right in the middle — the same motion as tying a knot in a ribbon.
Work the knot gently with your fingers until it sits flat and centered rather than twisted off to one side, then snug it just enough to hold its shape without crushing the ribbing flat.
How To Join The Ends Into A Loop
With right sides together, line up the two short ends of the strip. Using your long tail and a tapestry needle, whip stitch across the short edge to join them into a continuous loop, working through both loops of each stitch on both sides for a secure, low-bulk seam.
Turn the loop right side out and settle the knot back into place at the center front.
Weave in the seaming tail and the starting tail securely.
Finishing
- Weave in all ends carefully — pull tails through several stitches before trimming so they can’t work loose with wear
- Steam or lightly block the seam flat if it’s sitting a little bulky; this settles the stitches without flattening the ribbing
- Machine wash at 30°C in a mesh laundry bag, reshape and lay flat to dry
Tips For Best Results
Keep your tension even across rows: Since the whole headband is just one long strip, a tension that drifts tighter or looser partway through will show up as a strip that isn’t a consistent width. If you set it down mid-project, give the first row back a slow, careful look before speeding back up.
The knot hides a multitude of sins: If your seam isn’t perfectly invisible, don’t worry — it sits at the back of the head, and the knot at the front is what draws the eye.
Color idea: A two-tone version, worked in one color for most of the strip and switching to a second color for the last few inches before the knot, makes the knot itself pop as a color-blocked detail.
As a gift: This headband pairs sweetly with the Bloom Bonnet ribbon baby booties for a coordinated baby shower gift set.
Frequently Asked Questions
What size does this pattern make? The chart above covers newborn through 12 months. For toddler sizes, add roughly 1.5 more inches to the strip length before tying the knot.
Can I skip the knot and just wear it as a plain band? Yes — simply join the ends into a loop without tying a knot first for a plain ribbed headband.
My strip is curling instead of lying flat — what am I doing wrong? This is almost always a tension issue with the back-loop-only stitches. Try going up half a hook size, and make sure you’re consistently working into the back loop only, not accidentally catching both loops on some rows.
Can I use a different stitch instead of hdc-blo? Yes — plain hdc (both loops) gives a smoother, less ridged fabric with slightly less stretch, which also works well for this pattern.
Can I sell items made from this pattern? Yes — you’re welcome to sell finished items made from Bloom Bonnet patterns. Please credit BloomBonnet.com when sharing online.
How do I keep the headband from sliding off? The back-loop ribbing gives good grip and stretch on its own, but if it still slides on very fine newborn hair, a couple of small hidden stitches tacking the knot to the band underneath can help it stay put.