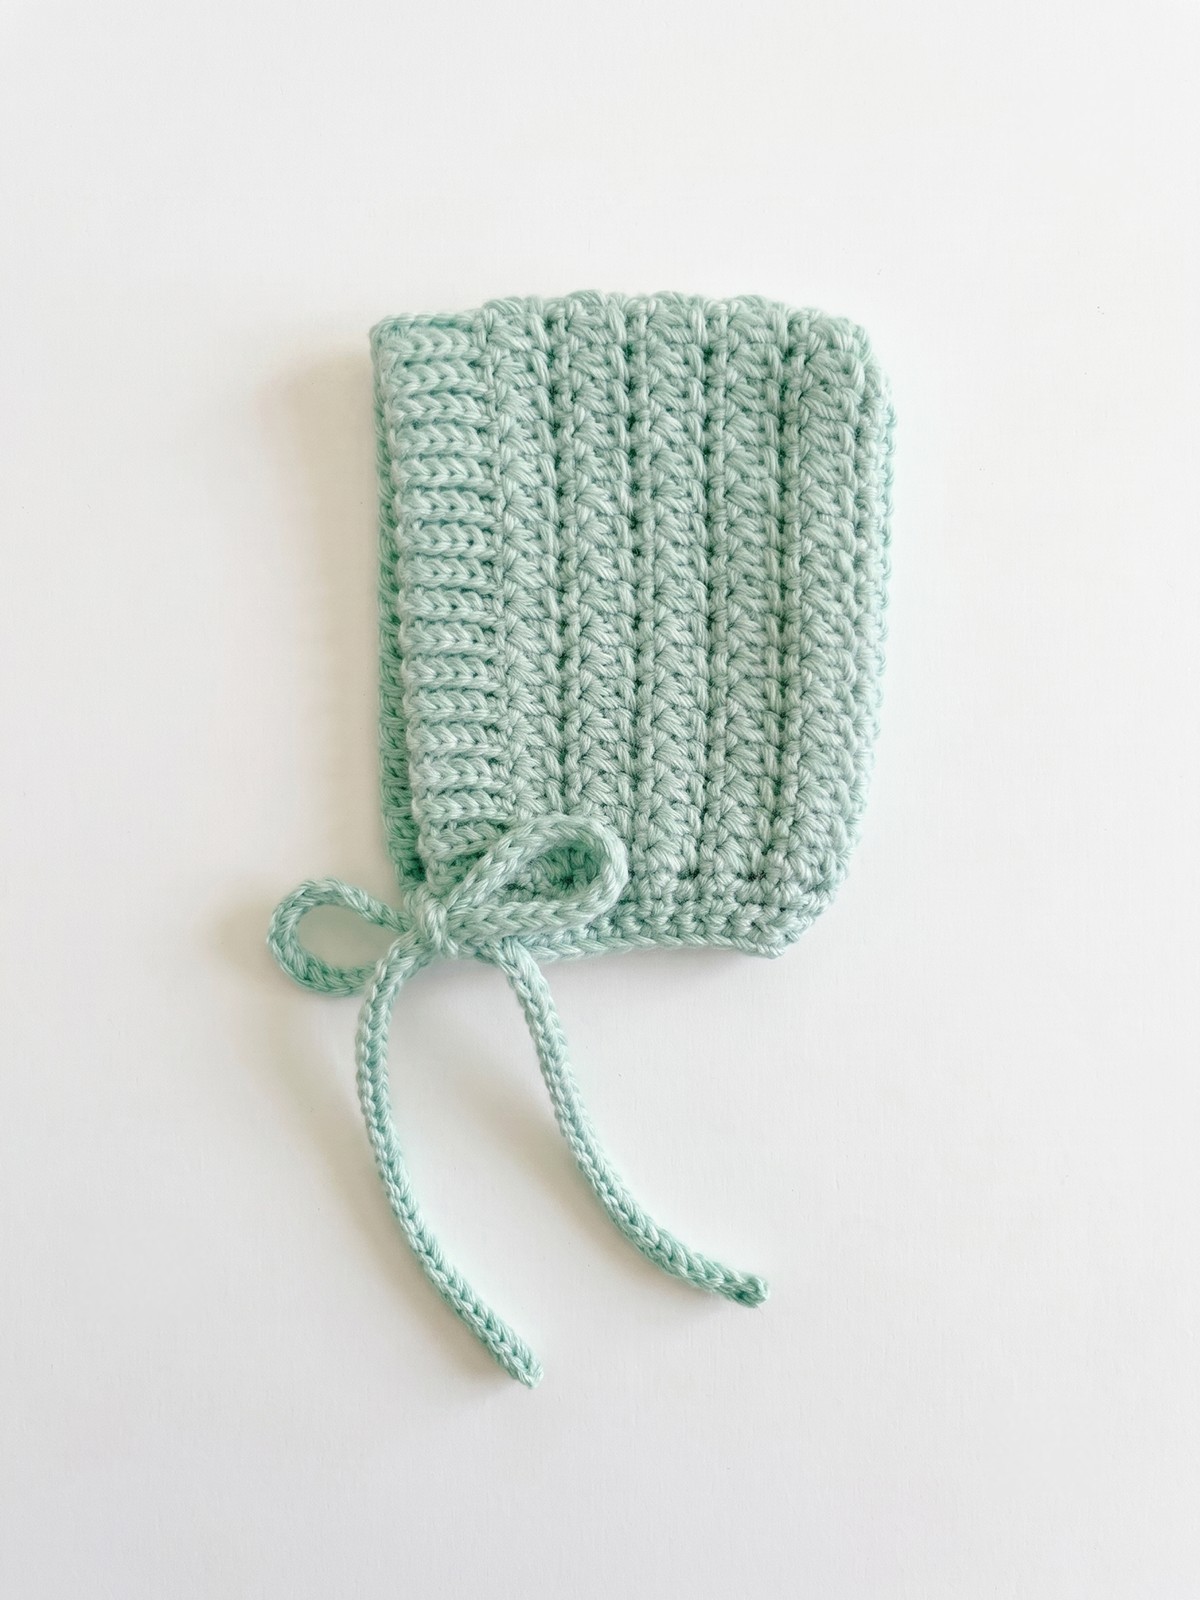

This free crochet cluster stitch baby bonnet pattern is a lovely step up from a plain bonnet — instead of smooth rows, the whole cap is textured with raised little clusters that catch the light and give it a soft, bobbly, hand-knit look. It’s still worked entirely in the round from the crown down, so there’s no seaming and no fiddly shaping to worry about.
It’s beginner-friendly, uses just one special stitch (which we walk through step by step below), and works up in about 1.5–2 hours. The clusters add texture without adding real difficulty — once you’ve made the first one, the rest is just repetition.
What Yarn Is Best For This Bonnet?
Cluster stitches show up best in a yarn with good stitch definition — something smooth and evenly spun. A DK weight cotton or cotton-acrylic blend works beautifully here: it holds the raised texture of the clusters crisply, washes well, and is gentle on newborn skin.
One 50g ball is enough for one bonnet with yarn to spare. Solid pastels show the texture off best — a fuzzy or heavily variegated yarn will hide all that lovely dimension, so save those for a different project.
Cluster stitches use a little more yarn than plain stitches of the same height, so buy a touch more than you think you’ll need if you’re working from scraps.
Materials
- Yarn: DK weight (Category 3), approx 70–90m
- Hook: 4.0mm (US G/6)
- Notions: Stitch marker, tapestry needle, scissors
- Ties: 60cm (24 inches) of narrow satin ribbon, or extra yarn to crochet chain ties
Gauge
14 sts × 10 rounds = 4 inches (10 cm) over cluster pattern, unblocked
Gauge doesn’t need to be exact for a bonnet, but if your crown is coming out much larger or smaller than the sizes below after Round 3, adjust your hook size up or down.
Special Stitch
3-Double Crochet Cluster (3dcCl): Yarn over, insert hook into the indicated stitch, yarn over and pull up a loop, yarn over and draw through 2 loops — 2 loops remain on the hook. Repeat this two more times, working each step into the very same stitch, until 4 loops sit on the hook. Yarn over and draw through all 4 loops at once.
This leaves a small raised bump sitting proud of the fabric — that’s your cluster. It looks fiddly written out, but your hands pick it up after the first two or three.
Sizes
| Size | Head Circumference | Crown Diameter |
|---|---|---|
| Newborn | 13–14 inches (33–36 cm) | 3.5 inches (9 cm) |
| 0–3 months | 14–15 inches (36–38 cm) | 4 inches (10 cm) |
Pattern is written for newborn. Changes for 0–3 months are shown in (brackets).
Abbreviations
| Abbreviation | Meaning |
|---|---|
ch |
chain |
sc |
single crochet |
dc |
double crochet |
sl st |
slip stitch |
3dcCl |
3-double crochet cluster (see Special Stitch above) |
st(s) |
stitch(es) |
rnd |
round |
RS |
right side |
Pattern is written in US terms.
How To Crochet The Cluster Stitch Baby Bonnet
How To Make The Crown
The crown is worked in the round from the center out, exactly like a flat circle — this becomes the very top of the bonnet.
With your yarn, make a magic circle.
Round 1:
- Ch 2 (counts as first dc throughout the crown)
- Work 7 dc into the magic circle
- Pull tail to close center
- Sl st to top of ch-2 to join (8 sts)
Round 2:
- Ch 2, 1 dc in same st
- 2 dc in each st around
- Sl st to top of ch-2 to join (16 sts)
Round 3:
- Ch 2, 2 dc in same st
- *1 dc in next st, 2 dc in next st* — repeat around, ending with 1 dc in the last st
- Sl st to top of ch-2 to join (24 sts)
For 0–3 months, work one more round: Ch 2, dc in each st around, working 2 dc into every 4th stitch (6 increases spaced evenly). Sl st to join. (30 sts)
Your crown should lie completely flat on a table. If it cups upward, go up half a hook size; if it ruffles, go down half a size.
How To Crochet The Cluster Body
From here you keep working in the round — no turning, no seaming. This is where the texture happens.
Cluster Round (work twice, with a Plain Round between each — see below):
- Ch 1 (does not count as a stitch)
- 1 sc in first st
- *3dcCl in next st, 1 sc in next st* — repeat around
- Sl st to first sc to join (24 sts [30 sts] — count stays the same)
Plain Round:
- Ch 1
- 1 sc in every st around, including into the top of each cluster
- Sl st to first sc to join (24 sts [30 sts])
Work in this order: Cluster Round, Plain Round, Cluster Round, Plain Round — four rounds total, ending on a Plain Round. This gives two full bands of clusters and enough depth to sit nicely on a newborn’s head.
Tip: Clusters naturally pull the fabric in slightly. If your bonnet feels snug after the first Cluster Round, that’s normal — it relaxes once the Plain Round is worked.
How To Finish The Edge
No folding, no seaming — the last Plain Round you worked is the face opening of the bonnet. All that’s left is to neaten it.
Edge Round (reverse single crochet / “crab stitch”):
- Without turning your work, sc from left to right instead of the usual right to left (for right-handed crocheters) — working into each st of the last Plain Round
- Sl st to join, fasten off, weave in end
Reverse sc gives a neat, corded finish that won’t curl. If you’d rather keep things simple, a regular round of sc worked in the usual direction looks lovely too.
How To Add The Ties
Ribbon ties (simplest option): Thread a 30cm (12 inch) length of ribbon through the stitches of the edge round on each side of the bonnet, at the point where the crown meets the body. Tie in a bow under the chin.
Crochet chain ties (no ribbon needed):
- Join yarn with a sl st at the edge, at the point where you’d like the tie
- Ch 40
- Sl st back along the chain from the 2nd ch from hook to the end
- Fasten off and weave in end
- Repeat on the opposite side
Finishing
- Weave in all ends carefully using your tapestry needle — pull tails through at least 4–5 stitches before trimming
- Block lightly by dampening the bonnet, shaping it gently over a bowl or your fist, and leaving to dry — this helps the clusters sit evenly and rounds out the crown
- Machine wash at 30°C in a mesh laundry bag, reshape and lay flat to dry
Tips For Best Results
Keep clusters loose: Work each cluster a touch looser than your instinct tells you to — tight clusters pull the fabric and distort the round. Snug is fine; tight is not.
Counting sanity check: After every round, count your stitches. The total should stay at 24 (30) throughout the entire body section — if it’s changed, you’ve likely missed a stitch or added an extra one in a cluster round.
Color ideas: A single solid pastel lets the cluster texture do all the talking. For a two-tone look, switch colors only for the Cluster Rounds and keep the Plain Rounds in your main color.
As a gift: This bonnet pairs beautifully with the Bloom Bonnet ribbon baby booties or rosebud bonnet for a coordinated baby shower gift set.
Frequently Asked Questions
What size does this pattern make? As written it makes a newborn bonnet. For 0–3 months, follow the bracketed instructions throughout.
Can I use worsted weight yarn instead? Yes — use a 5.0mm hook. The clusters will be bigger and more pronounced, and the bonnet will work up even faster.
My clusters look uneven — what am I doing wrong? Almost always a tension issue. Make sure all 3 “legs” of the cluster go into the exact same stitch, and keep your yarn overs consistent in tightness.
Can I skip the texture and just make a plain bonnet? Yes — replace the Cluster Rounds with plain sc rounds instead. You’ll get a simpler bonnet using the same crown and finishing.
Can I sell items made from this pattern? Yes — you’re welcome to sell finished items made from Bloom Bonnet patterns. Please credit BloomBonnet.com when sharing online.
How do I keep the bonnet on a newborn? Tie the ribbon or chain ties in a loose bow under the chin — snug enough to stay on but with two fingers of room. Never tie tightly around a baby’s neck.